
MacOs High Sierra | Final by Geekrar
If you’re looking to get a little more versatility out of your Windows, installing macOS is a great way of giving a shot. There’s nothing wrong with wanting to play in macOS interface or willing to get a full macOS experience you’re looking for. With that said, here’s a considerable way to install. So Here is Install macOS High Sierra on VirtualBox on Windows PC.

When starting a fresh installation of an operating system on your computer, you’ll need a few things to get started. First, you will need the Operating System image or installer file with you. For example, if you want to install Kali Linux on VMware or VirtualBox, you’ll need the Kali Linux ISO image file for installation. For this, you can head over to the official Kali Linux website and download the latest genuine version of the Kali Linux ISO image file, which works well with VMware and VirtualBox. In this article, you will need to download macOS High Sierra VMware and VirtualBox Image.
To continue with your install macOS High Sierra on VMware or install macOS High Sierra on VirtualBox, you’ll undoubtedly require the installer file. If it’s not readily available, you’ll need to download the installer filefor a virtual machine. You might assume that you can quickly get it from App Store or Apple’s official website, but unfortunately, this is not the case. That’s because Apple doesn’t support installing High Sierra or other macOS versions without an Apple computer such as a MacBook Pro or Airbook.
If you want to proceed with this type of installation, you will need the High Sierra (or any other version you want to install) installer file. A Virtual Image (VMDK) file is specifically for VMware or VirtualBox. If you were looking around for that, look no further because we have you covered with all the resources you’ll need. We should mention that updated versions are also available, and you can download and install them on your Windows system for free.
You can directly download High Sierra VMware and VirtualBox Image (which is the same for both virtual systems) stored on a robust cloud service like Google or Mega. There are many other ways to download installer files if downloading this way doesn’t work for you. Once more I want to note that macOS High Sierra VMware and VirtualBox file is compatible with VMware and VirtualBox. Please note before continuing. This post is for educational purposes only.
When you’ve downloaded the file and extract them, you can start with the installation.
Here’s how to install macOS High Sierra with the new method.
we’ll install macOS High Sierra on VMware on Windows PC with macOS High Sierra ISO. The installation of macOS High Sierra on VMware requires VMware Unlocker Patch Tool or macOS VMware Unlocker Patch. This is easy to download VMware Unlocker Patch Tool and also easy to install. From the time when installing an operating system out of Windows came into our mind, what we started thinking was whether it’s possible to install macOS High Sierra on Windows because macOS is the significant rival of Windows. While Windows does almost everything we would like to do, sometimes it does it in the best shape that we assume can’t be more advanced, but there is always plenty of room to make a change and improve. While we can’t talk one by one, but as an example, we’ll take a few. Suppose shooting or scanning a nearby object and it will straightly appear on your Mac.
But Microsoft has neither its own phone nor its features which could be done like this but chances are you might have iPhone and would like to try this feature out. Another feature that comes is to do things with the updated smart assistant Siri, like Cortana on Windows. It’s smarter, reliable, and more intelligent to do things. Including that, there are dozens of new features and updates like iOS features, Auto Unlock with Apple Watch, shopping with Apple Pay by Touch ID, Storing desktop and document files in iCloud and more, to name a few.
Install macOS High Sierra on VMware on Windows PC [New Method]
Trying those even some of those features for a Windows user is one of their top demand. While we’ve install macOS High Sierra on VMware on Windows and also install macOS High Sierra on VirtualBox on Windows, there are also some other ways to approach. Just like we did 3 ways to install macOS Catalina on Windows, there are more than one ways to do this. Just like we installed macOS High Sierra on VMware and on VirtualBox, we’ll do it in a different way different file.
Now, these two ways are done within two another ways we’ll show you. As we installed macOS High Sierra on VMware and VirtualBox with a single macOS High Sierra VMware & VirtualBox. In this post, we’ll install macOS High Sierra on VMware on Windows PC with a new method which is done with macOS High Sierra ISO For VMware & VirtualBox.
Now with this new method, you can probably install macOS High Sierra on VMware which makes another way for installing it. Suppose if installing macOS High Sierra doesn’t work with the first method, you can opt for this one. It’ll make most users who have a problem installing High Sierra with the previous method, they’ll have now definitely another way to try on which in our case should work perfectly fine.
Step One – Create or Download High Sierra ISO
For installing any operating system, we’ll need the operating system installer file. For this process, we’ll need macOS High Sierra ISO file which can be either created or obtained. Fortunately, we’ve covered both the option. The first one is to create macOS High Sierra ISO which is also super easy, but requires a macOS and reliable internet connection.
The second one is obtaining macOS High Sierra ISO which is easier than the first one. This one is created and provided by us through links uploaded to two different servers in two different sections. The file is provided in one part and also in several parts for easier download. Here’s the macOS High Sierra ISO file.
macOS High Sierra 10.13.6 Final Version (17G66) September 26, 2019
- Just like installing macOS Mojave, macOS Catalina, and other versions, High Sierra also requires installer files for installing. Regardless of where you are installing it, it will probably need the installer files to adapt there. Now as the installation differs, the installer files also differes. This file is different from a typical macOS High Sierra DMG file whether downloaded from the App Store or from somewhere else. This file is particularly made for installing macOS High Sierra on VMware on Windows PC. So without further do, let’s do it first.
Step Two – Install VMware Workstation Pro or Player
From the BIOS, watch out if the Intel VT-x hardware acceleration options are enabled. Now, while we’ll be installing High Sierra on VMware, we’ll need to install VMware Workstation or Player first. It’s pretty easy as installing any other app and won’t take much time. Download VMware Workstation or PLayer first.
Once that’s done, extract it and open it up. Go Next with a few simple wizards and it will begin the installation. When it’s done, click on Finish.
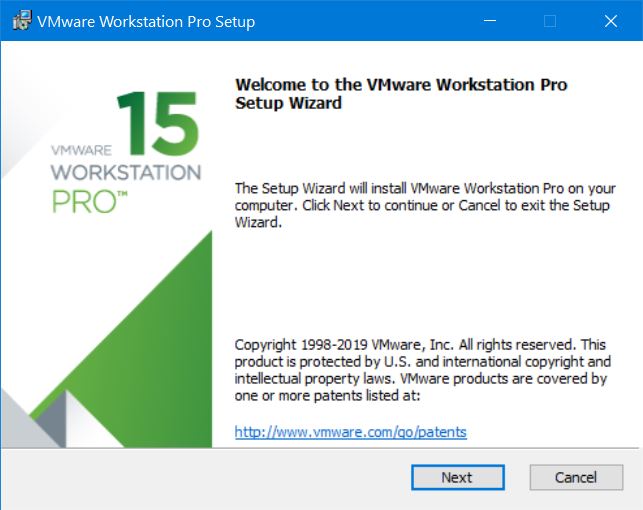
VMware Workstation Setup
Step Three – Install VMware Unlocker Patch Tool
Unlike VirtualBox, VMware doesn’t support installing macOS by default, but there’s a simple workaround for that. For this fix, we’ll use the VMware Patch Tool or popular as Unlocker for VMware. What this does is, it patches VMware when it’s closed and let us install any macOS on VMware with all its features. Here’s how to do it.
When it’s there, before installing it, close VMware Workstation or Player completely first.
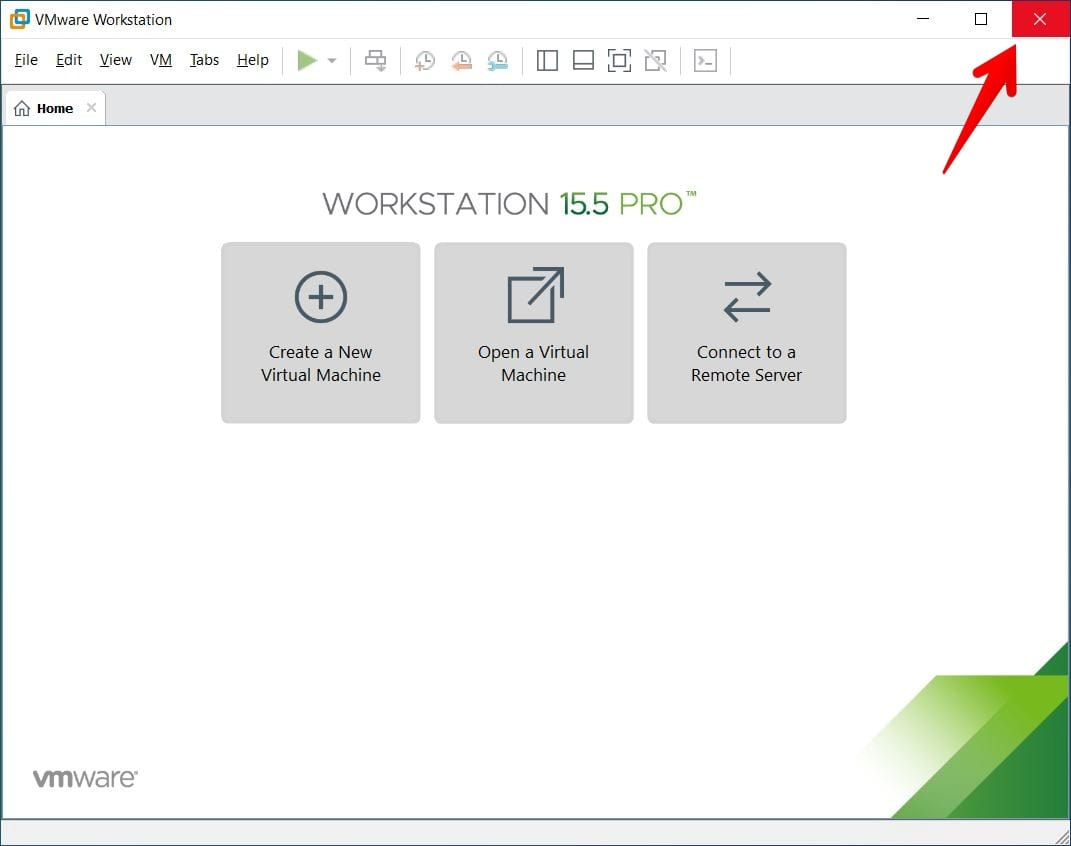
Close VMware
Now open up Unlocker and right-click on win-install and select Run it as Administrator. It will immediately start patching VMware and will close up once it’s done with Command Prompt.
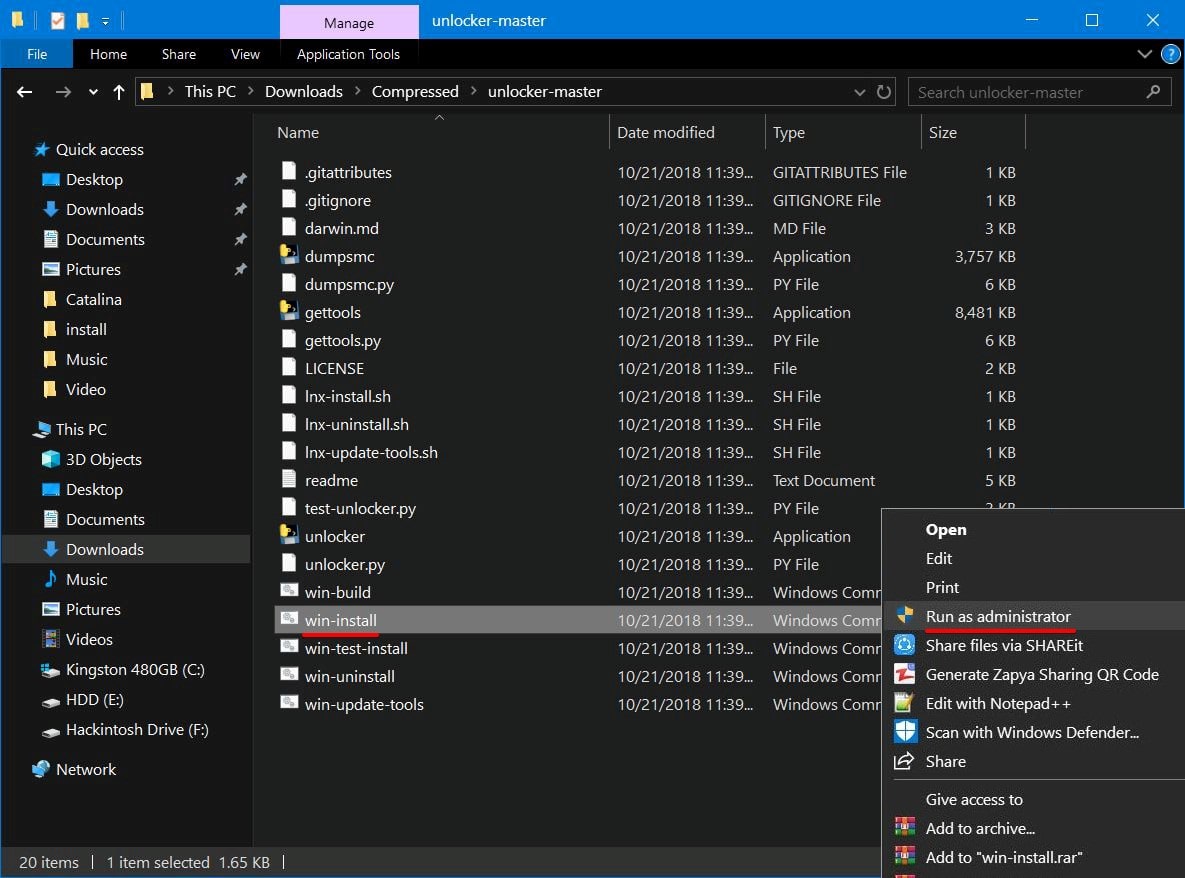
Run as Administrator
Step Four – Create A New Virtual Machine
To install High Sierra on VMware, fire up VMware first.
Next, when it appears, we’ll need to Create a New Virtual Machine, so click on that.
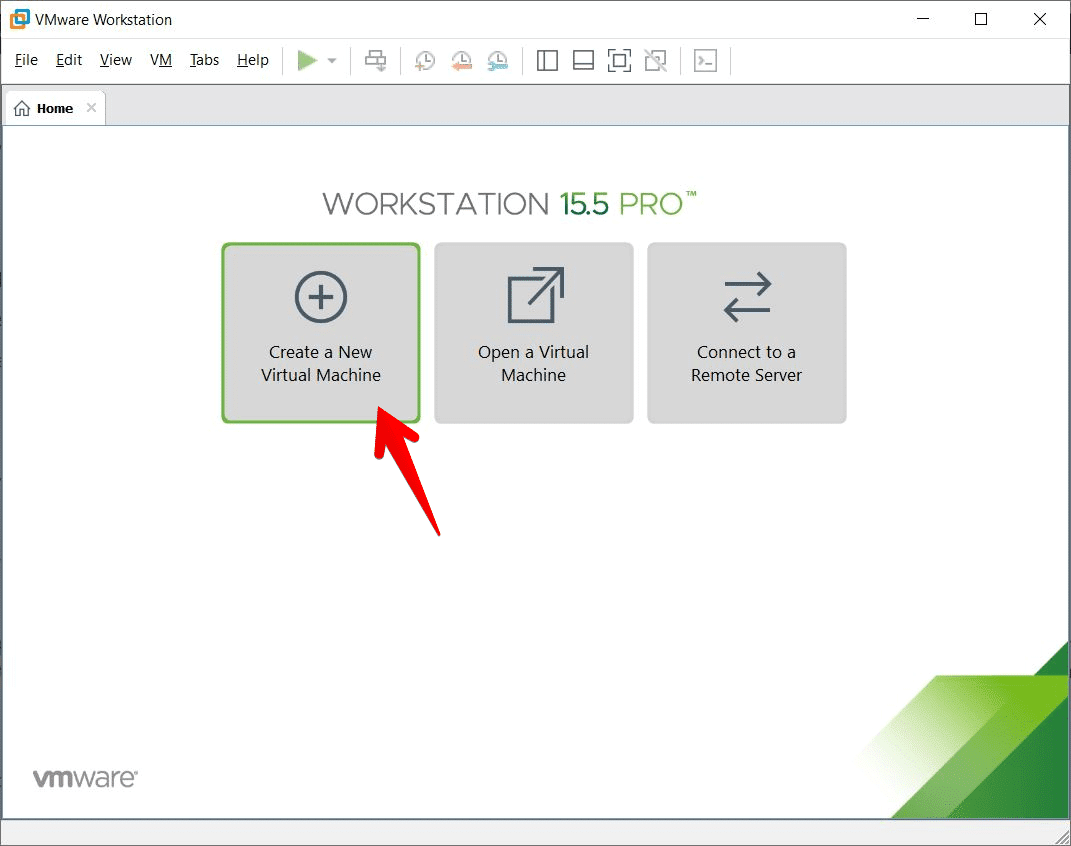
Create a New Virtual Machine
Let this window by default and click Next.
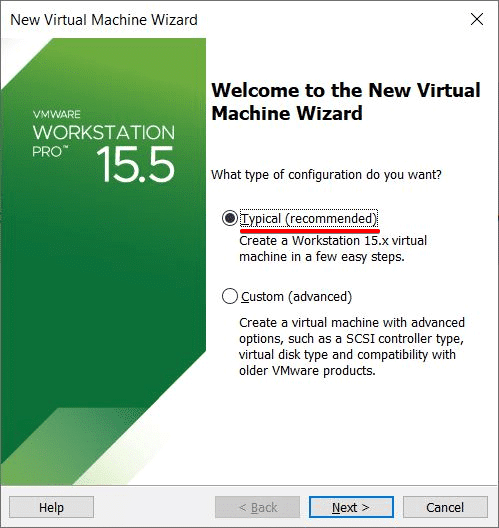
New Virtual Machine Wizard
In this window that appears, select I’ll install the operating system later and click on Next.
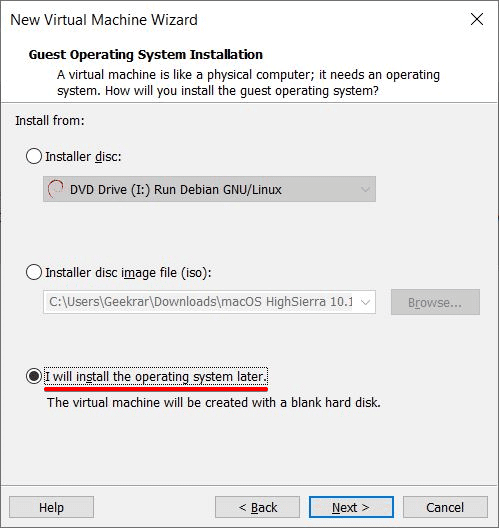
Guest Operating System Installation
From the top, select macOS X for the operating system and 10.13 for the version and click on Next.
If for some reason there is no macOS in the operating system list, it’s likely that the Unlocker hasn’t patched correctly and chances are VMware was open when installing the patch.
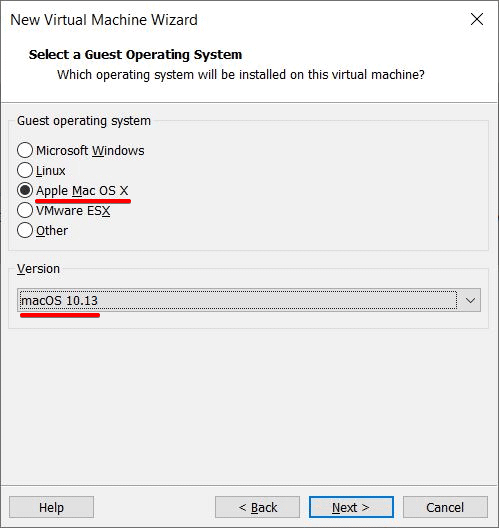
Select a Guest-Operating System
Now put a name and specify where to store the machine files then hit Next.
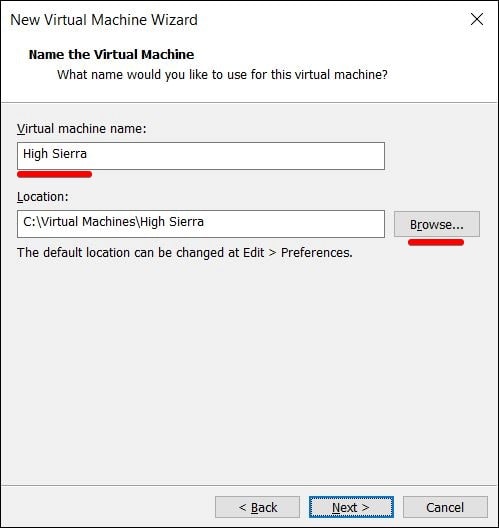
Name The Machine
Set 100GB at least or more and click Next.
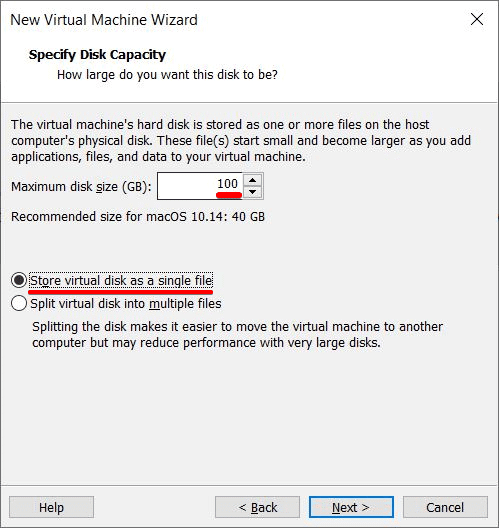
Specify Disk Capacity
Step Five – Set Up Virtual Machine Settings
Without settings, the machine isn’t able to install macOS High Sierra on it.
So click on the Edit virtual machine settings and let it open.
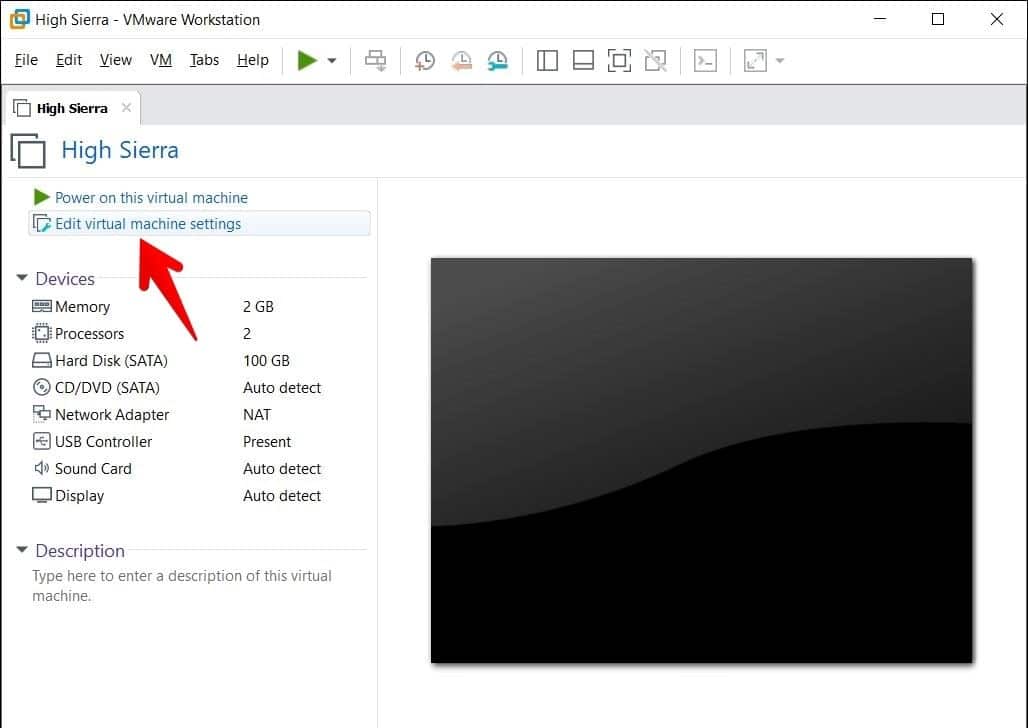
Edit Virtual Machine Settings
When the virtual machine settings opened, increase the memory to half of your system’s memory.
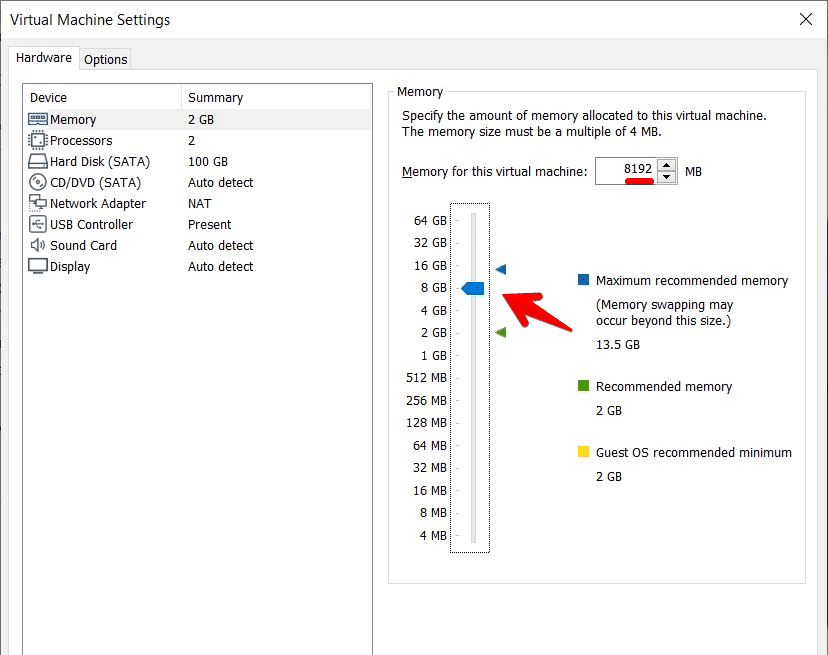
Virtual Machine Settings
Coming to the next tab which is processor, increase the processor to at least 2 or more.
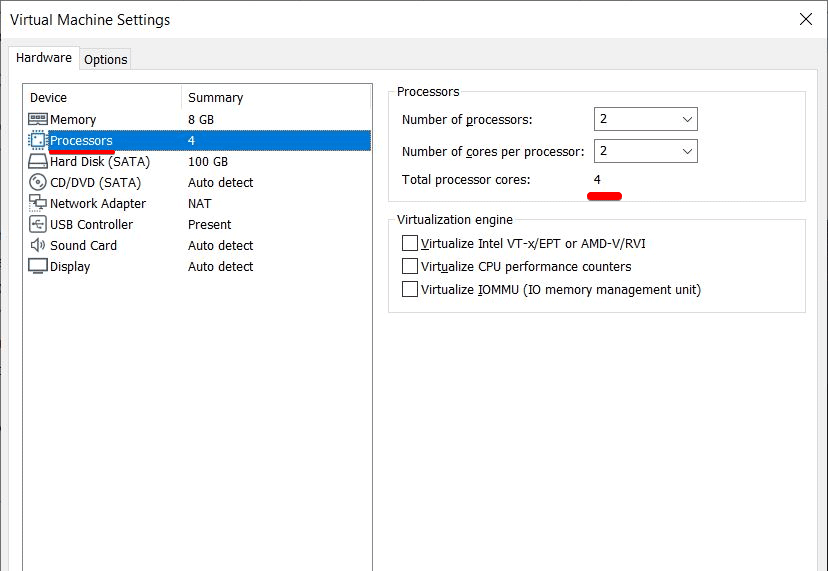
Increase Processors
Skip the next tab and it will be on CD/DVD (SATA), then select Use ISO Image file from the right side and click on Browse and choose macOS High Sierra ISO.
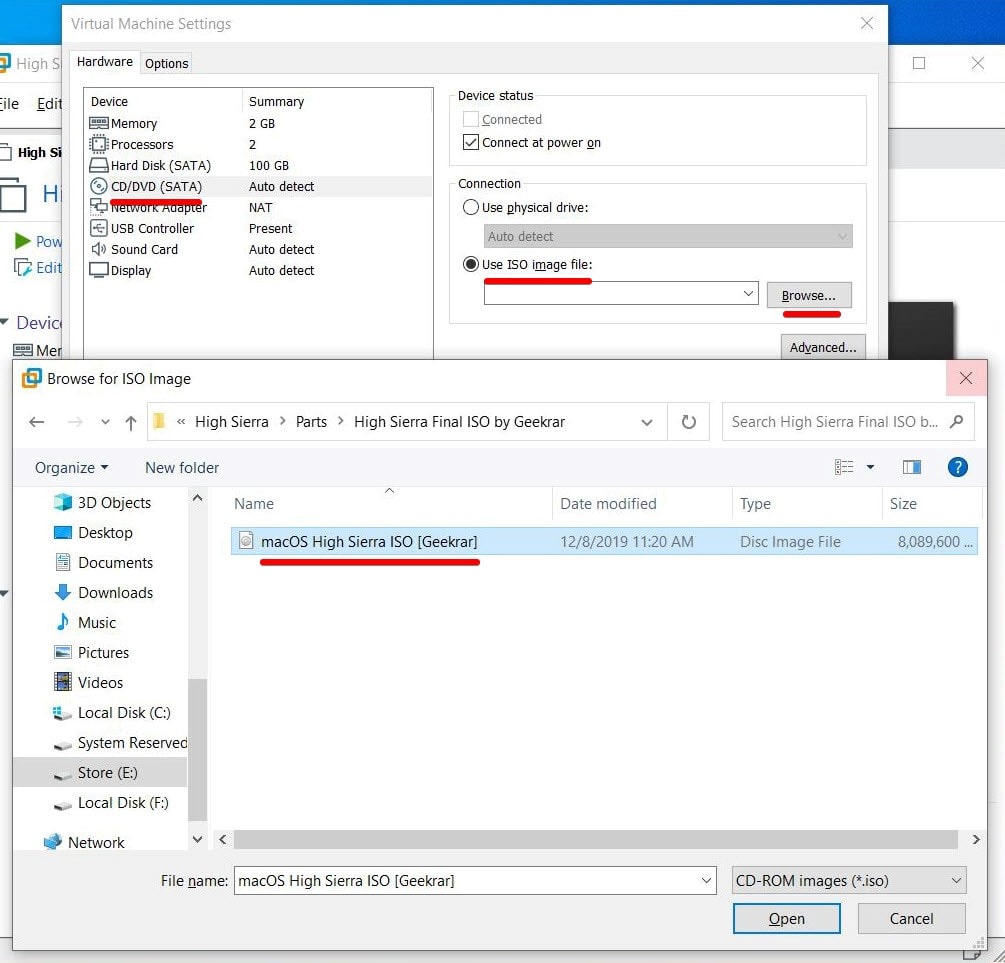
Browse macOS High Sierra ISO
For working mouse & keyboard, select the USB version that is compatible with them. When it’s done, click on OK.
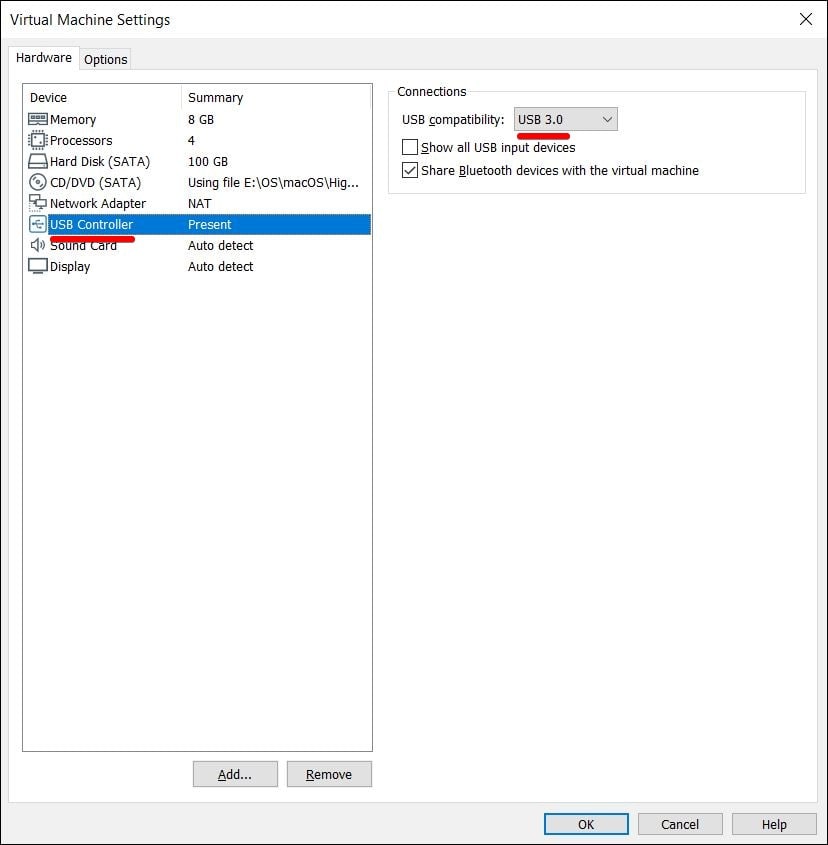
USB Controller
Step Six – Insert Config Key on VMX File
The settings for the machine is finished from VMware. Now what’s left is editing and adding a command to the VMX file of the machine.
First, close out of VMware and make sure it’s off. Navigate to machine files and right-click on the file that ends with .VMX and open it with Notepad.
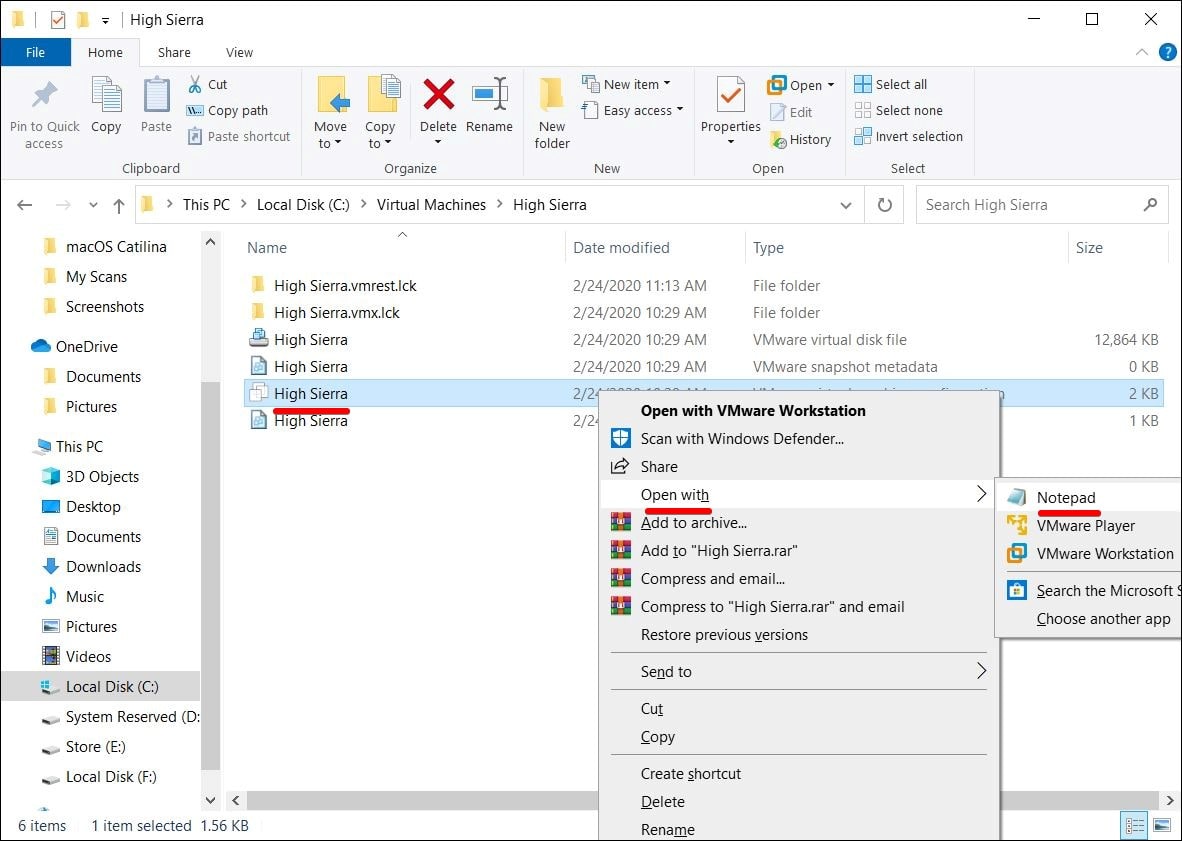
Open With Notepad
Once the file is there, scroll down to the end and enter the command.
smc.version = “0”
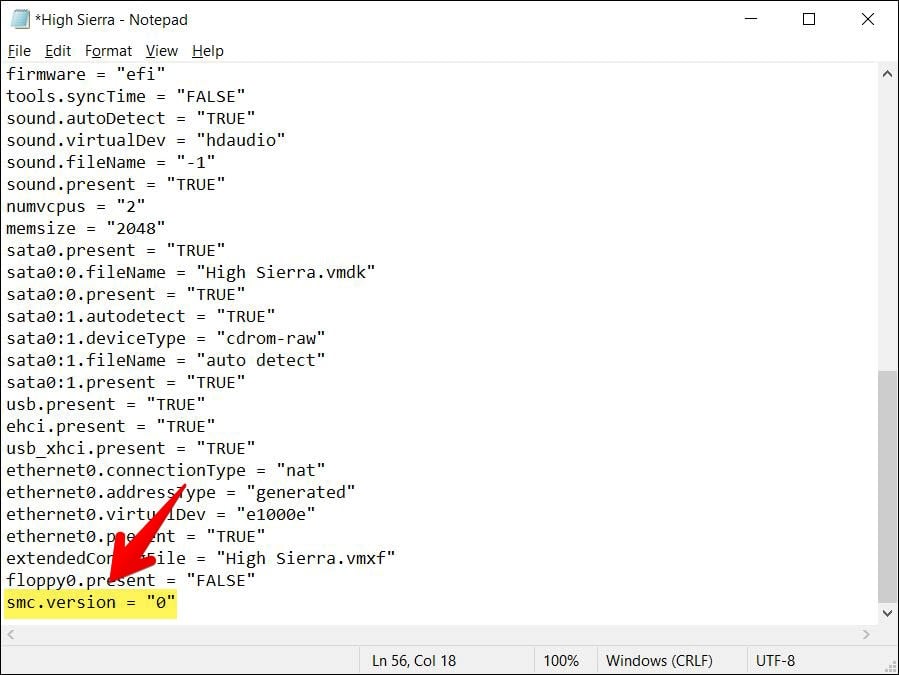
Add Key
When finished, close it and click on Save.
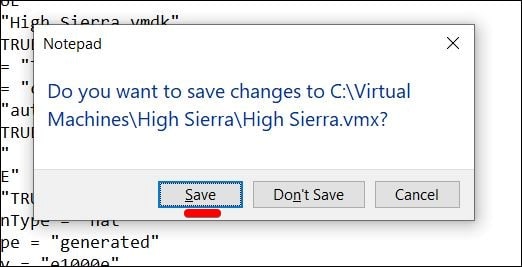
Save
Step Seven – Install macOS High Sierra on VMware
Time has come to take off and there’s no better time than this when settings have finished.
Start the machine by click on Power on this Virtual Machine.
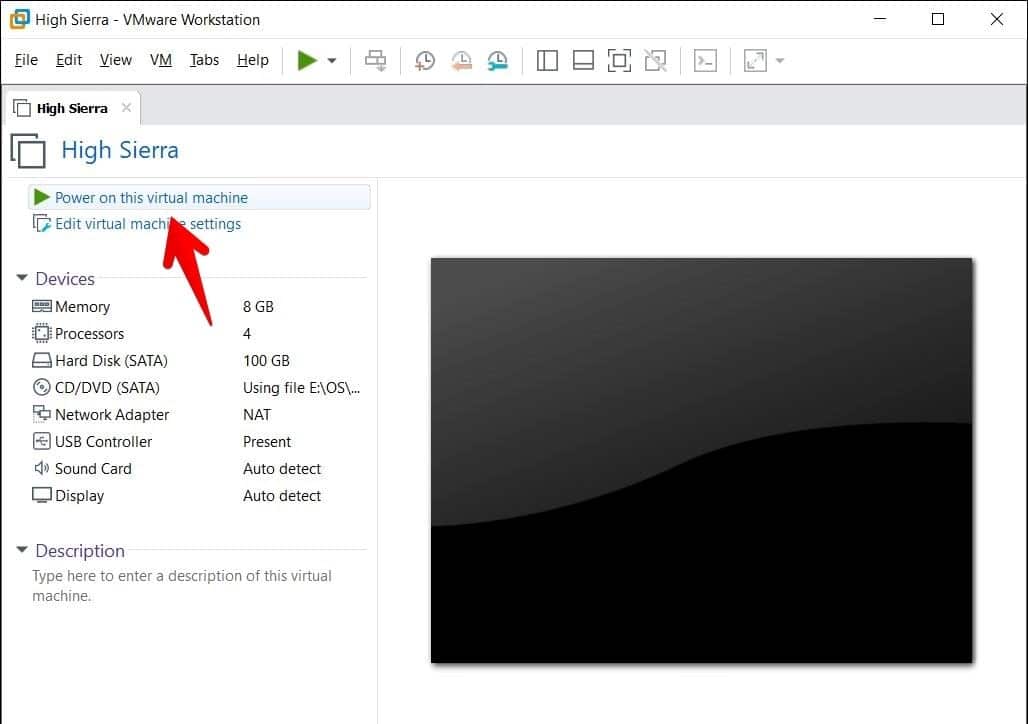
Power on This Machine
When it finished loading, Continue with the language window.
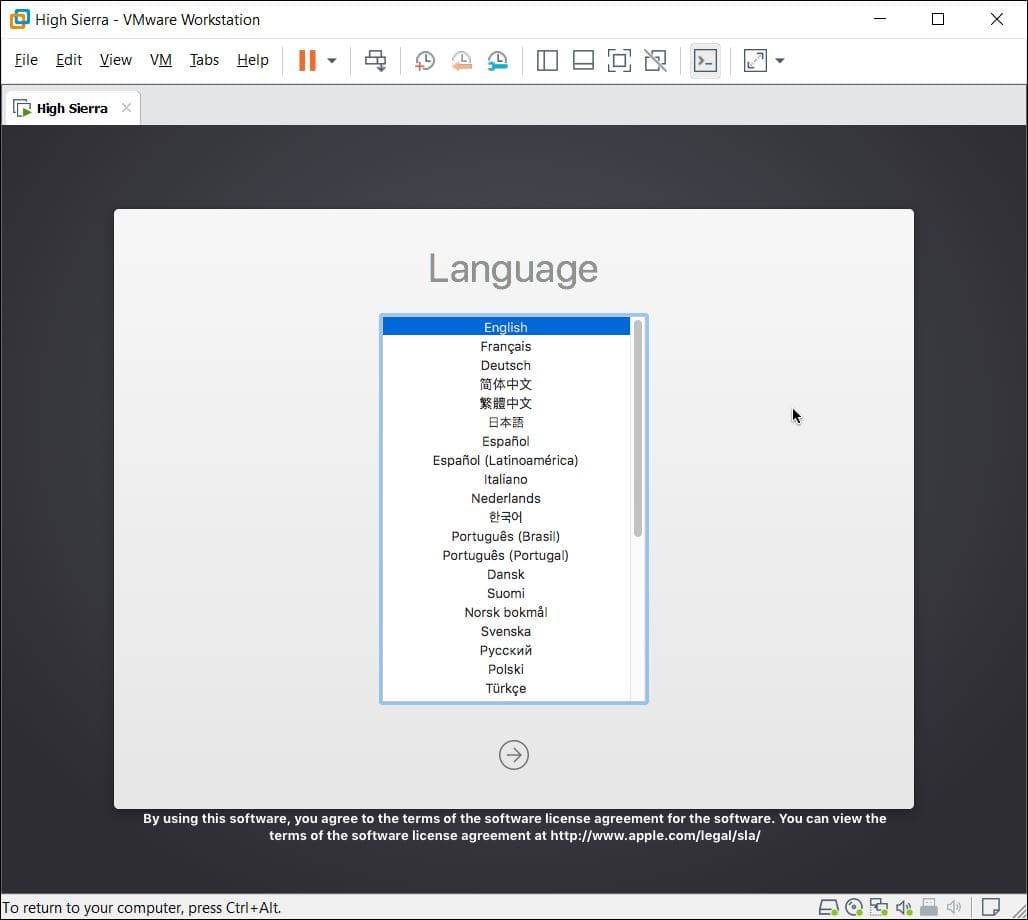
Language
Now select Disk Utility from the screen and click Continue.
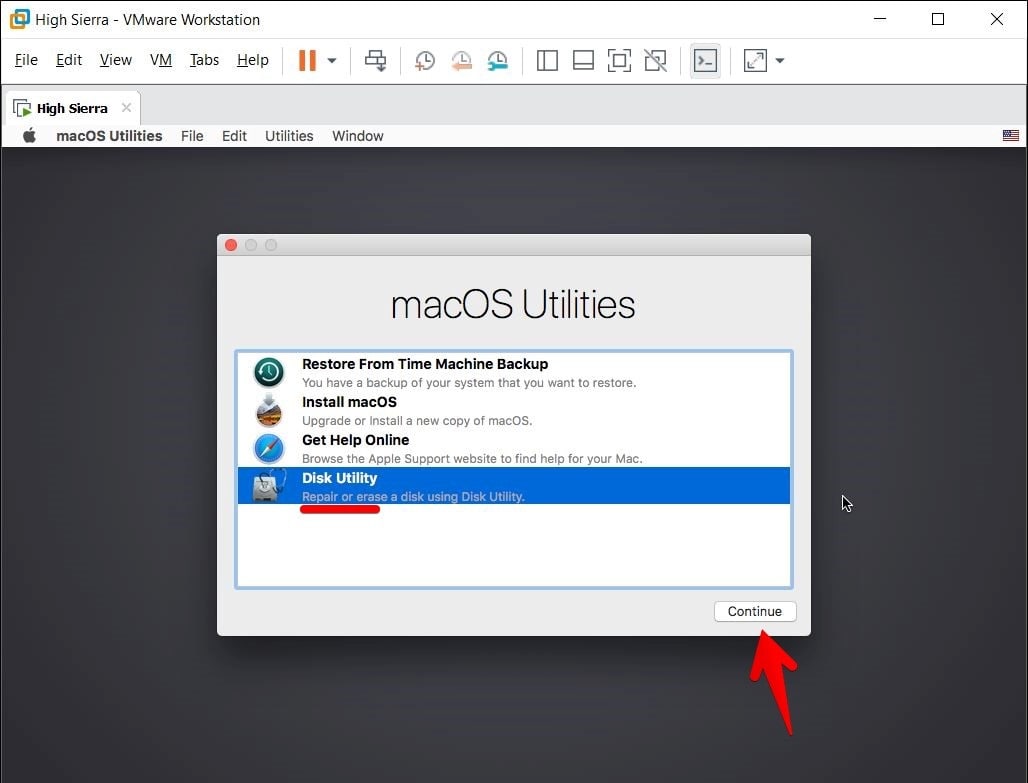
Disk Utility
In this screen, select the “VMware Virtual SATA..” disk and click on Erase.
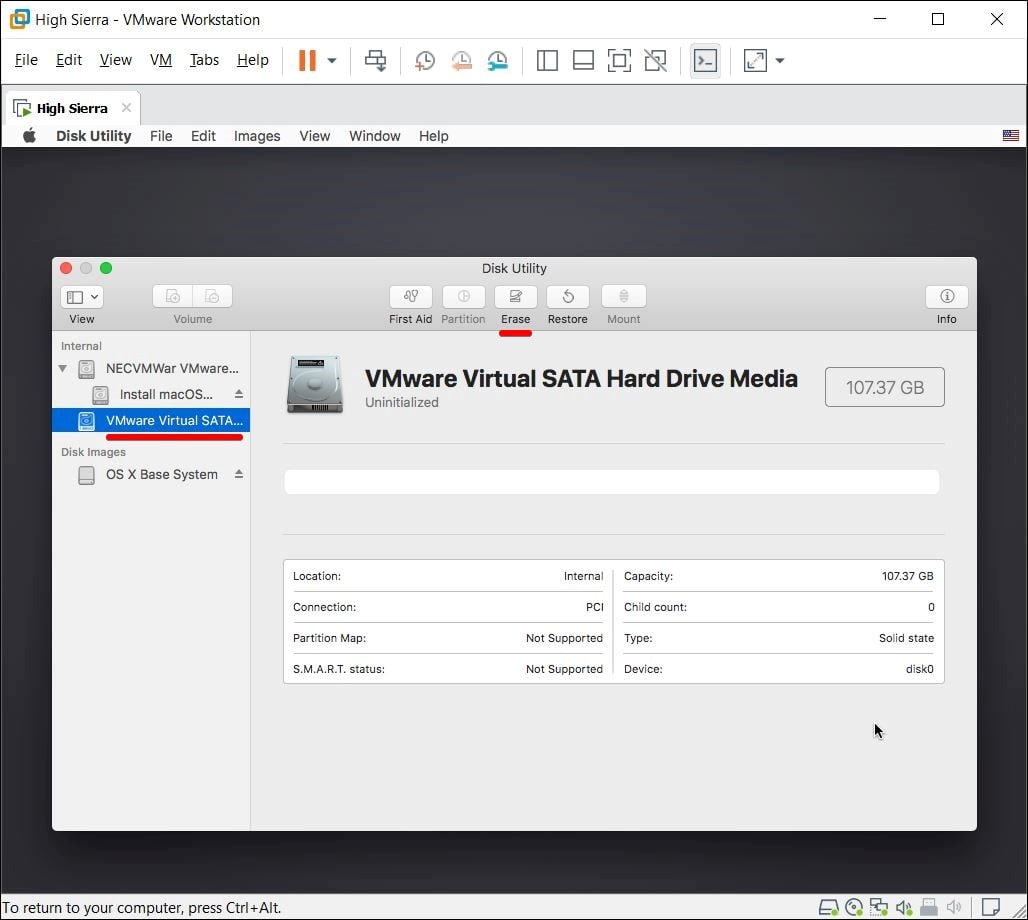
Choose Disk
Name the disk and click on Erase.
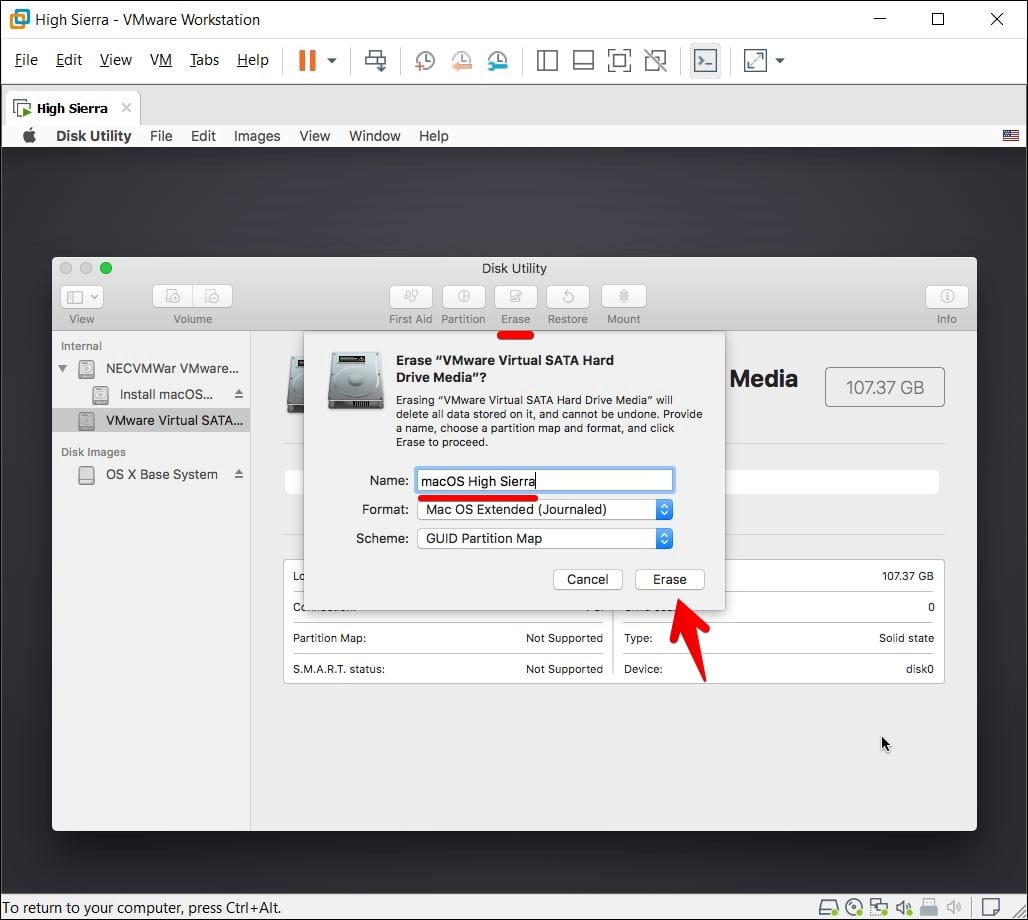
Erase Disk
Once finished, click on Done and close the entire window.
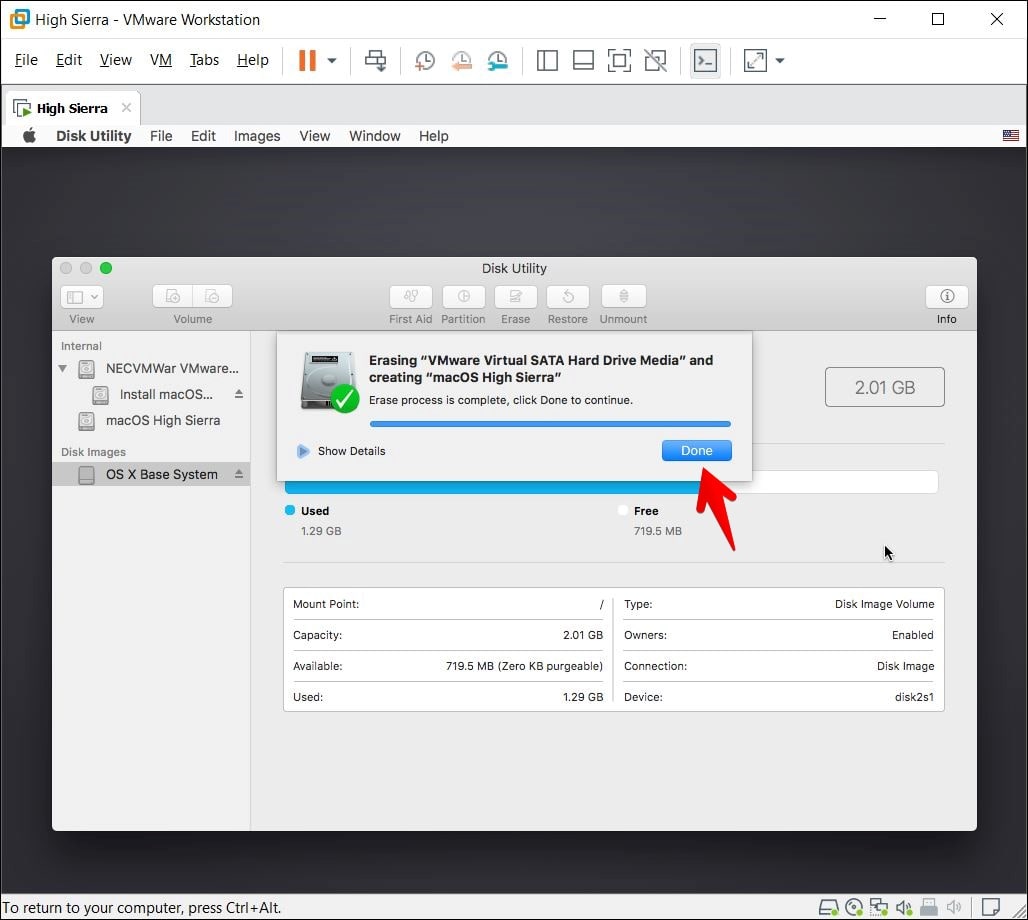
Done
On the previous window, select Install macOS and click Continue.
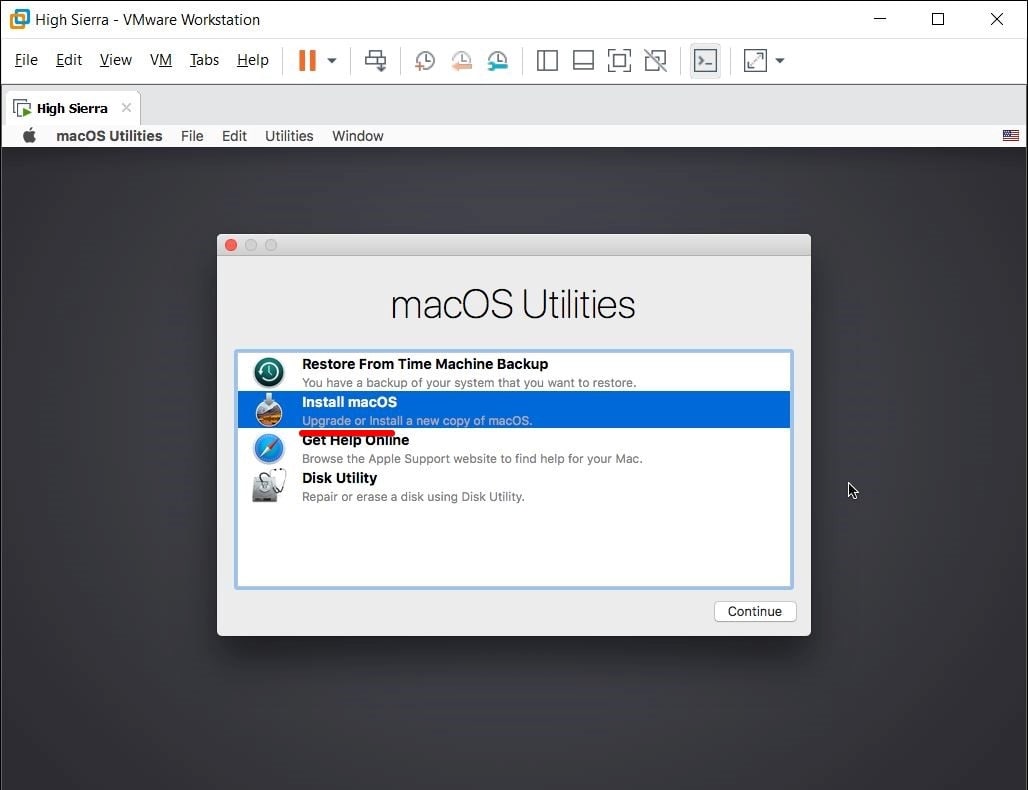
Install macOS
Continue with the window.
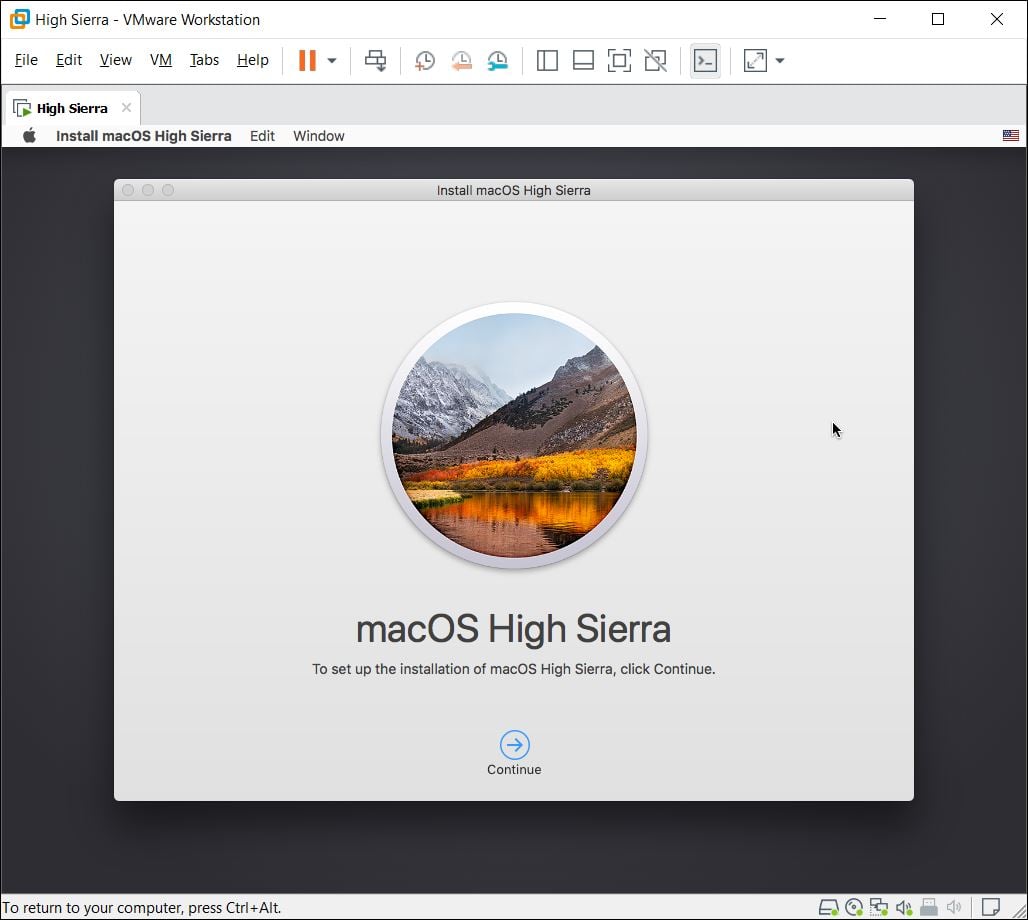
macOS High Sierra
Accept the terms and conditions and click on Continue.

Terms & Conditions
Now select the disk we had formated and click on Install.
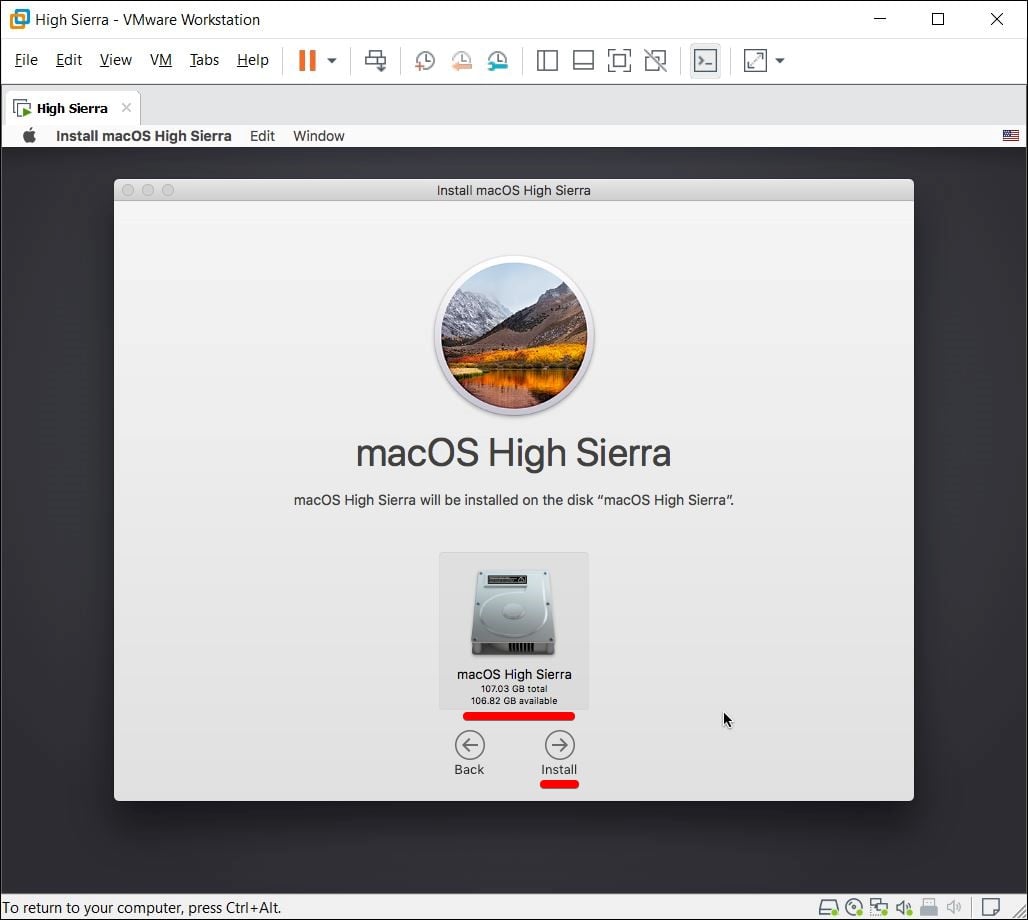
Install High Sierra
It will begin installing macOS that will take some while.
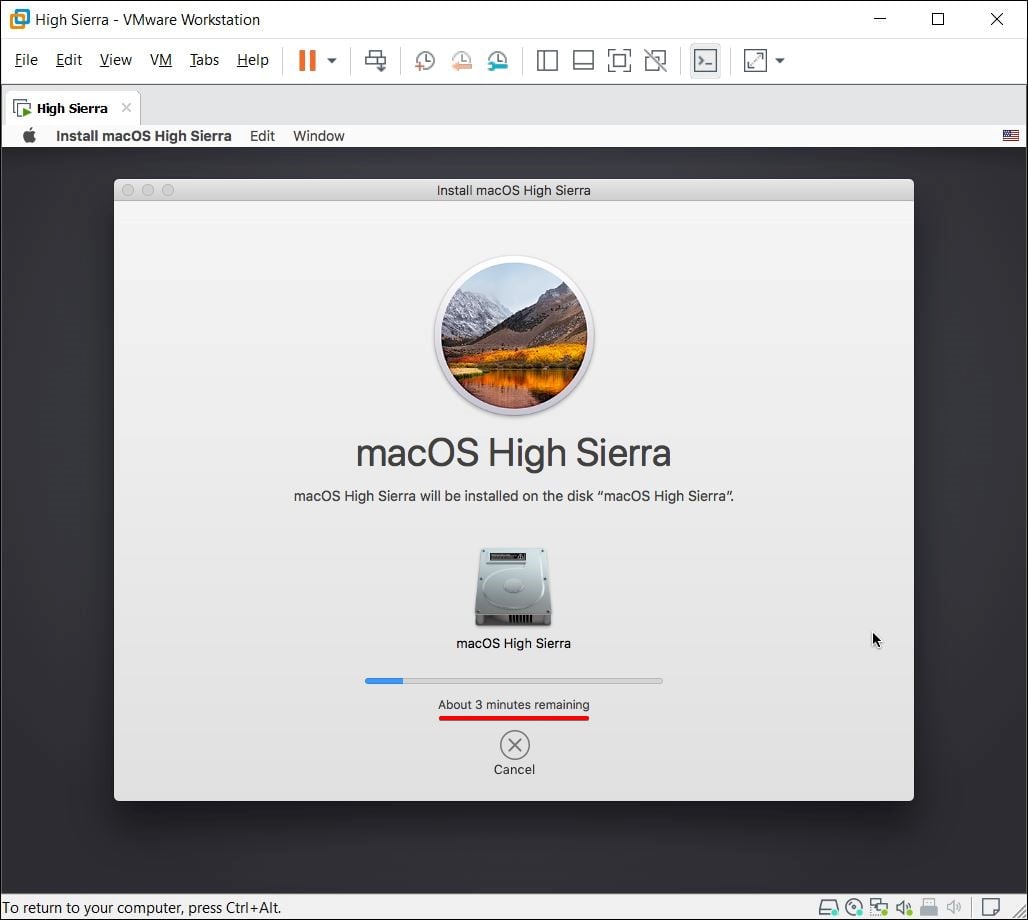
Installing macOS High Sierra
On the actual installation screen, proceed with the installation steps which are as simple as making a few clicks.
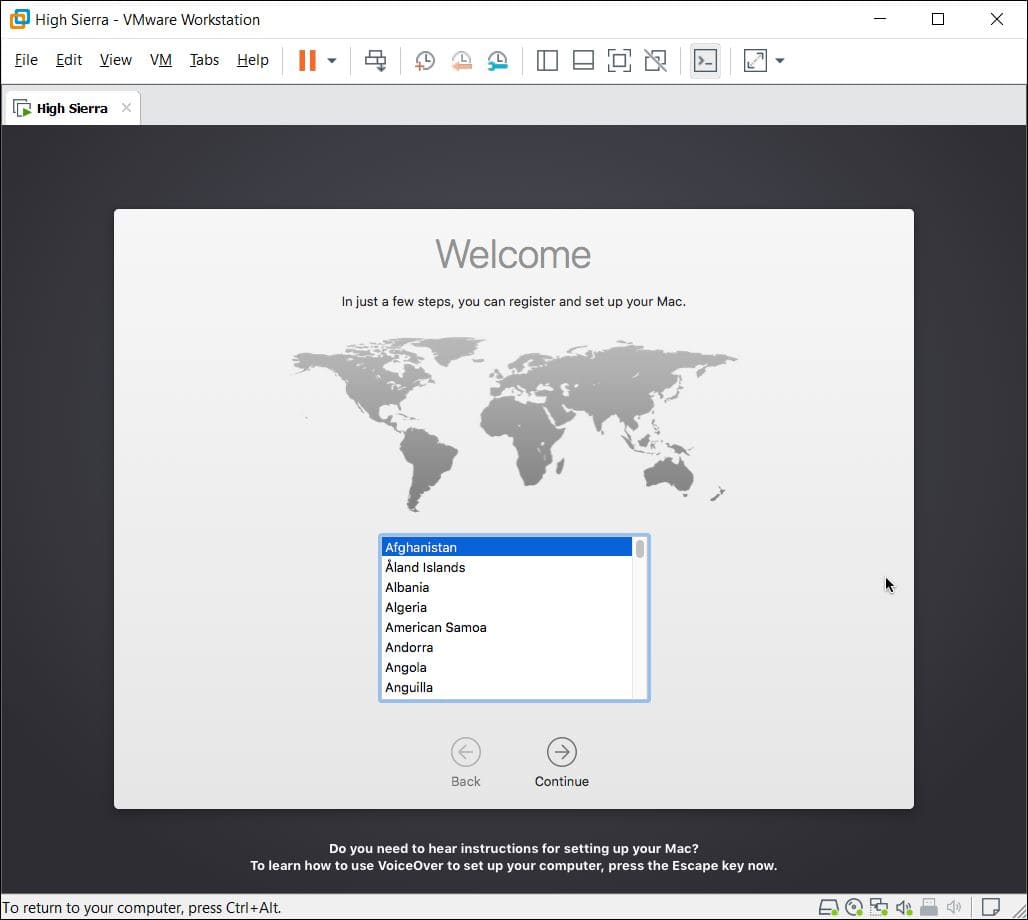
Welcome
In between, create an account by filling out the blanks with your personal information and click on Continue.
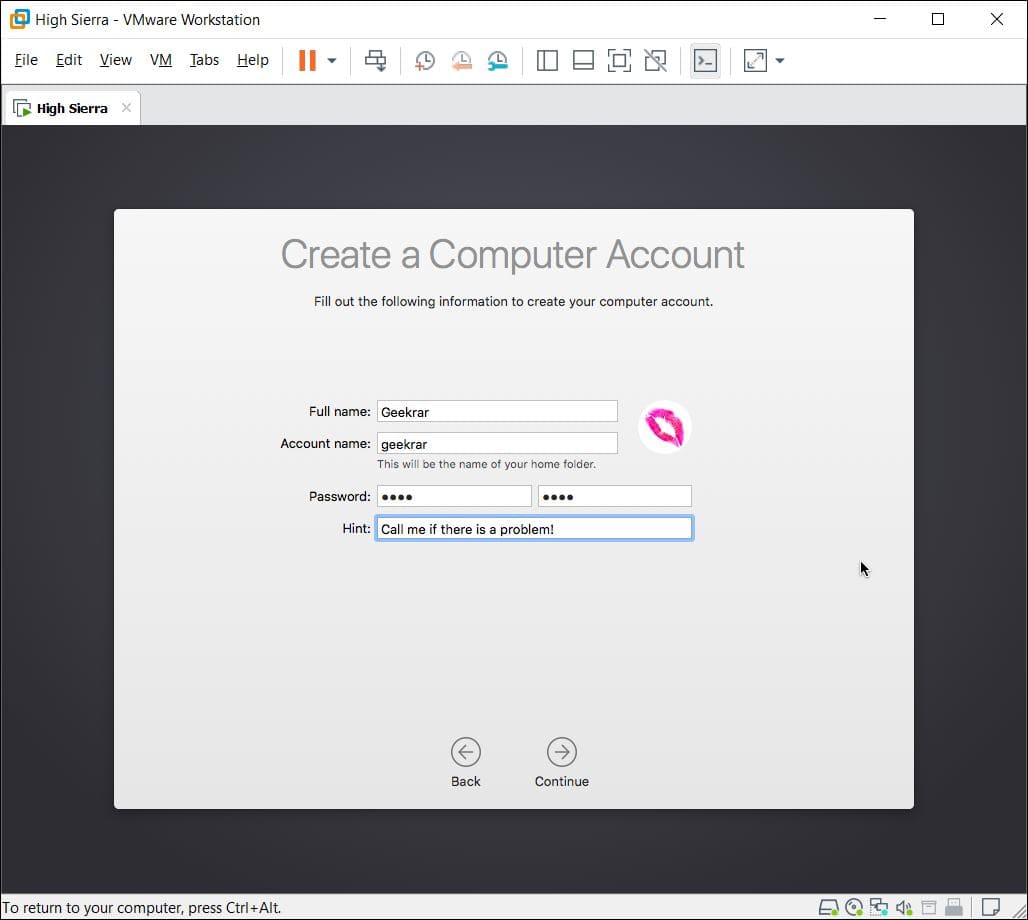
Creating Your Account
With proceeding a few steps, you’ll eventually install macOS High Sierra on VMware on Windows PC with a new method.
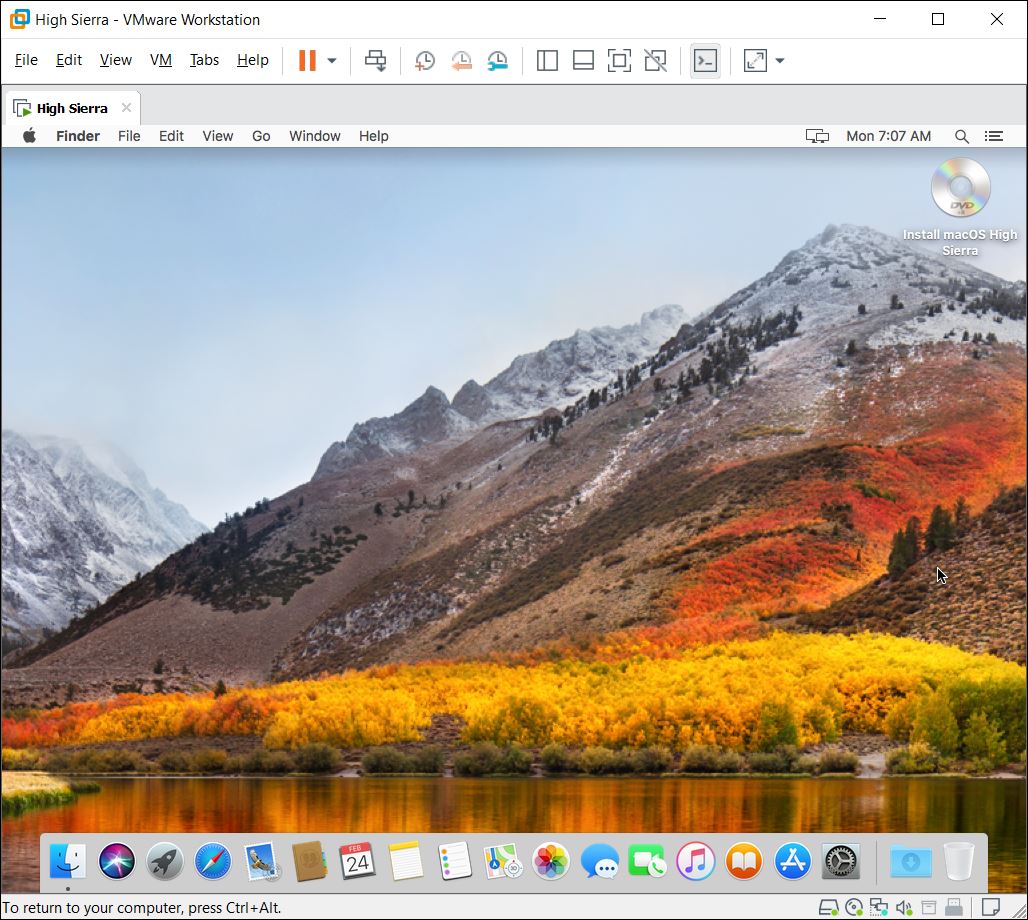
Install macOS High Sierra on VMware on Windows PC
Final Step – Install VMware Tools on macOS High Sierra
While this is optional but it’s as necessary as a step. That’s why we’ve added this to a step. As familiar from its name, it’s a collection or a set of essential tools which enhances the performance, increases the screen resolution to the actual resolution, share files via drag & drop and more. As we’ve done it previously, we’ll put the link to it.
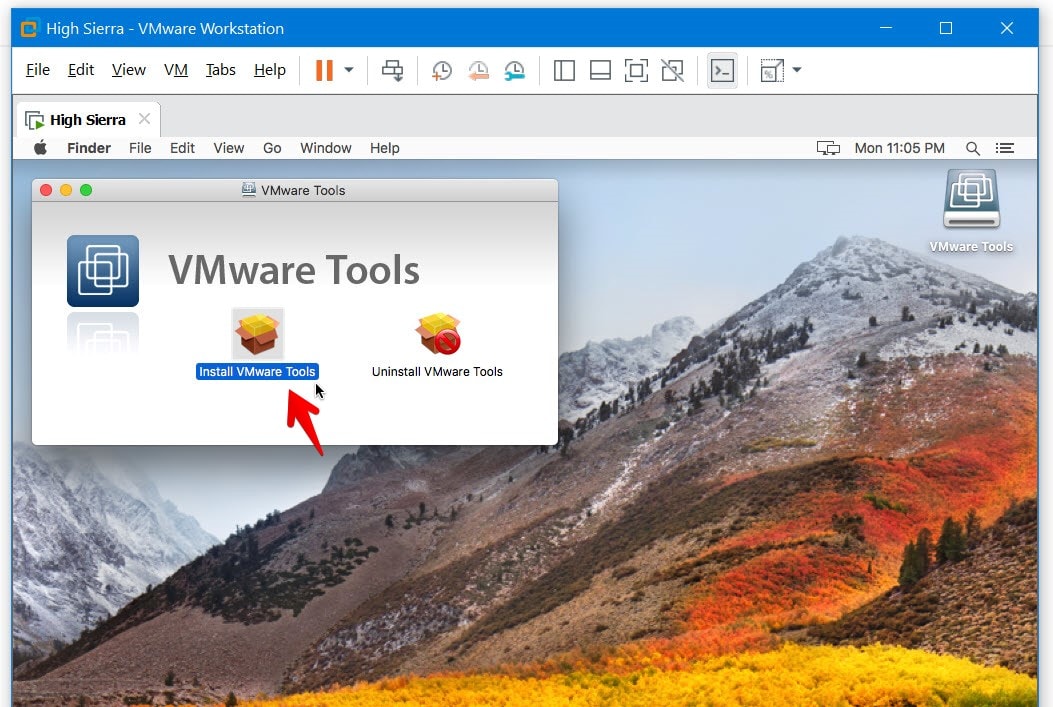
VMware Tools
For more caution and safe, I would probably recommend taking a snapshot which will include the entire system image. Whatever files and settings are there, it will save a copy of those and can be revert back when it’s required. But before anything, I would take a snapshot now.

Take and Use Snapshots on VMware
With all that done, if there’s some problem or errors that pop up, we’ve done the fix beforehand. Here’s how to fix those.
With everything set and an installed VMware Tools, there shouldn’t be any problem but as of a performance, we’ve an exclusive step by step tutorial. Here’s how to do it.
In this point, we’ve the latest version of macOS High Sierra installed through macOS High Sierra ISO for VMware & VirtualBox. If there’s a newer version released, we’ve shown how to update to the latest version of High Sierra.
That comes near to the end. If there’s something left or would like to add or give us some kind suggestions or ideas for improvment, we’re happy to hear.
⇩ Link(s) ⇩:
LINKS TO DOWNLOAD:
DIRECT LINK FROM GOOGLE DRIVE: DOWNLOAD


Leave a reply